| |
Classic Tomb Raider Games - MODDING, Costumes, Textures |
|
 |
| (The tutorial has been written by badboy70 from the Tomb Raider Forums.) |
CHANGING MESHES
Tools needed: FexMerger and PixStr
Note: the main function of this tool is to swap things between level files. I think it's possible to alter the meshes too, but I'll have to do some research. If I figure it out I'll post it here too but I tihnk it'll be a lot of work.
Preparing your files
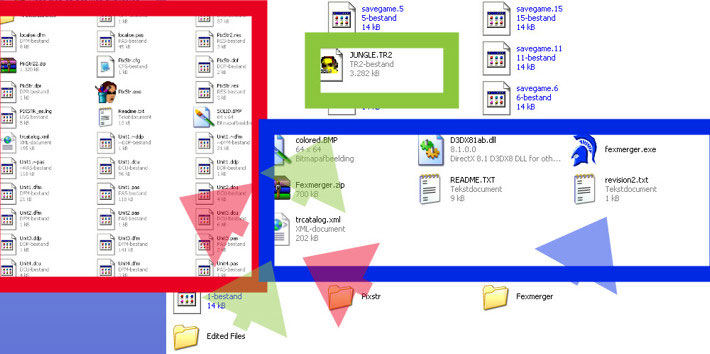
If you haven't done the Changing Textures (method 2) tutorial, you'll have to make three folders: PixStr, FexMerger and Edited Files.
Note: PixStr is only if you want to change the textures.
Copy the files you want to edit (Source File and Target File) to the Edited Files folder; I'm using JUNGLE.TR2 as Source File and NEVADA.TR2 as Target File. |
Note: In this screenshot NEVADA.TR2 can't be seen, sorry for that.
Editing
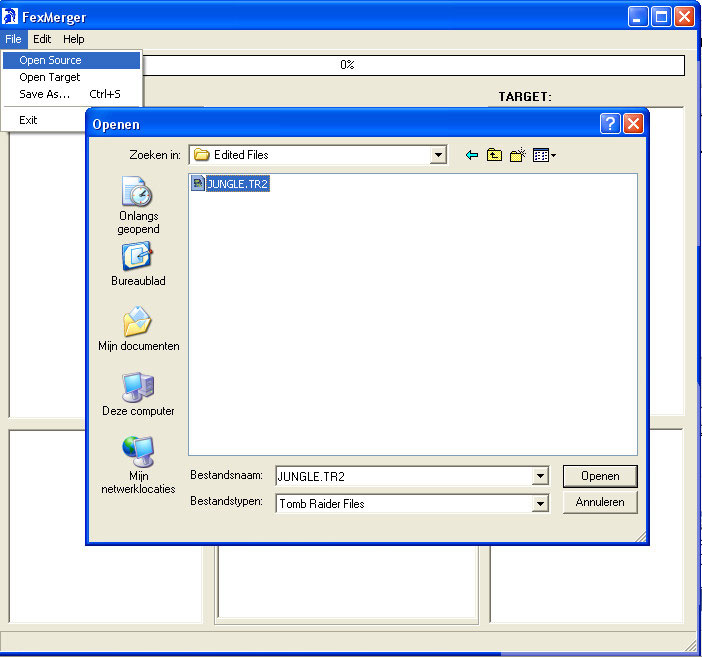
Open the Source file: |
Then do the same for the Target File.
Note: Target File = where the things from the Source File will be transported to.
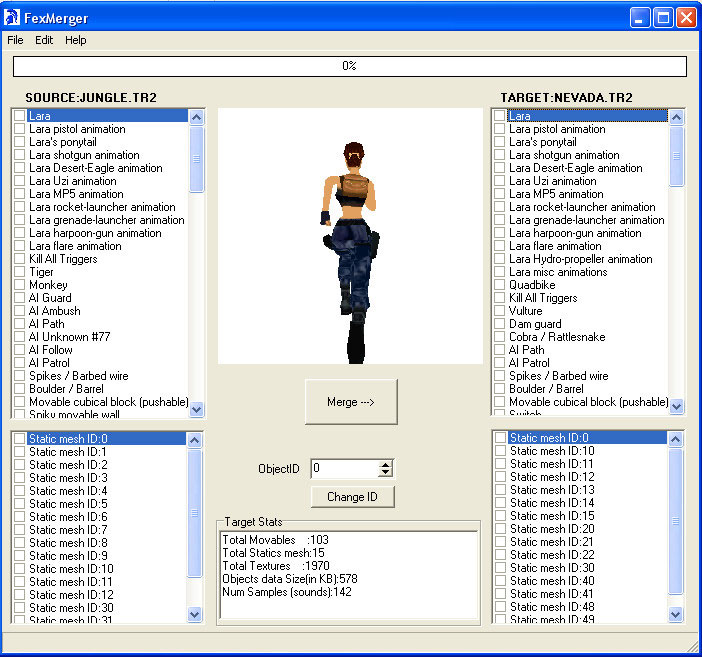
You'll have something like this:
|
|
Now select the object from the Source File you want to copy to the Target File and press
Merge.
Then go to File\Save as and save the file.
Then overwrite the one in your data folder. Play! |
|
IMPORTING MESHES (method 1)
Note: this is for the advanced user. You MUST know how to work with TRLE. For now, here's a quick explanation.
It's easy if you know how to work with FexMerger, StrPix, tr2wad and tom2pc.
You need to use the original level file when converting to a WAD!
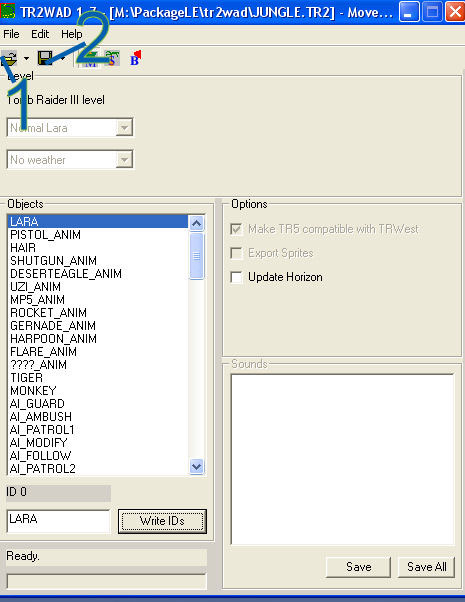
1. Open tr2wad
2. Load the original level file
3. Save the WAD |
|
|
| 4. When asked for the main.sfx, go to the data folder and open it.
5. Now you have a WAD.
6. Open StrPix.
7. Load the WAD.
8. Go to the mesh you want to edit.
9. File\Export DXF.
10. Now edit it.
11. When finished: File\Import DXF.
12. Save the WAD.
13. Open NGLE.
14. You'll get two errors, ignore those (press OK).
15. Go to Objects\Load objects.
16. Load your WAD.
17. Go to Project\Output WAD.
18. Now run NG_Tom2Pc.
19. Under Edit Script, press Add.
20. Go to the folder where your wad is, and select it.
21. Click on Build All.
22. Now follow the steps above.
IMPORTING MESHES (method 2)
If you know how to make levels in TRLE, make a dummy wad, put your items in it and then convert it to TR4. Then use FexMerger to swap files.
Here's a small example to show it works 100%:
|
|
 |
|
| EXPORTING, EDITING, AND IMPORTING MESHES AND TEXTURES
Tools needed: TRViewer
Exporting
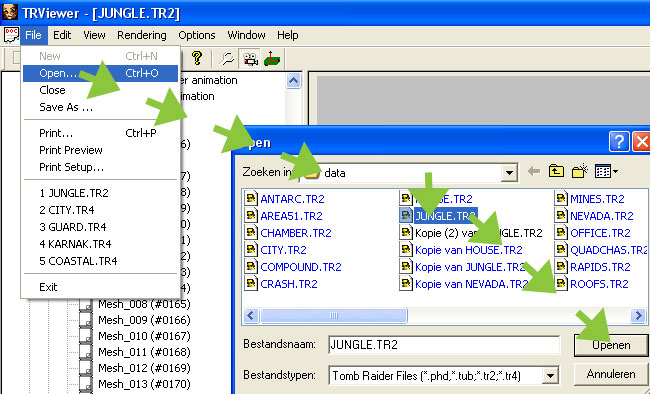
1. Open the level you want to edit.
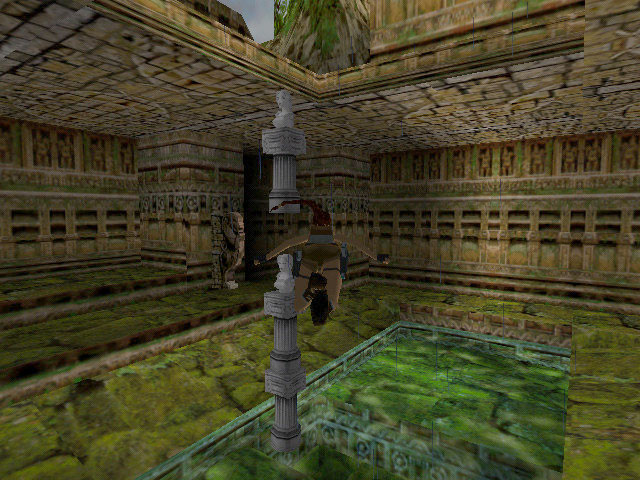
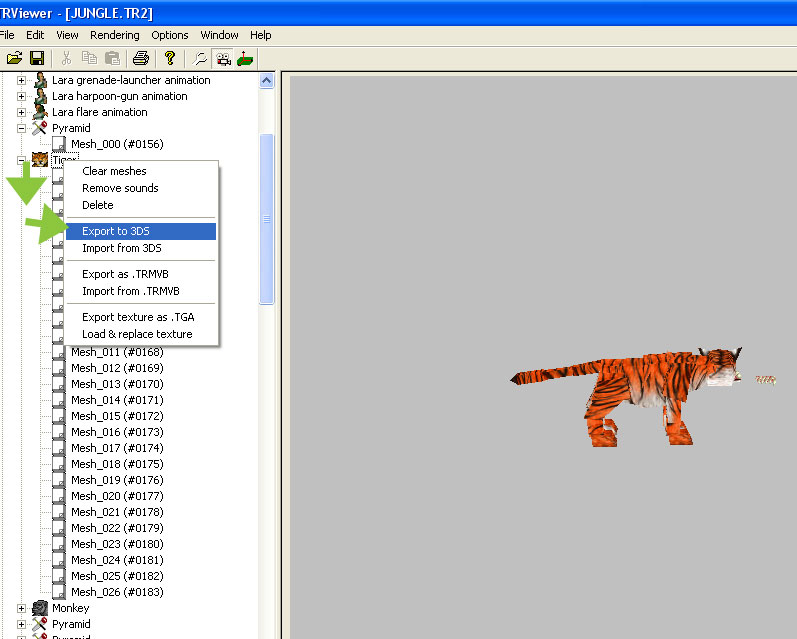
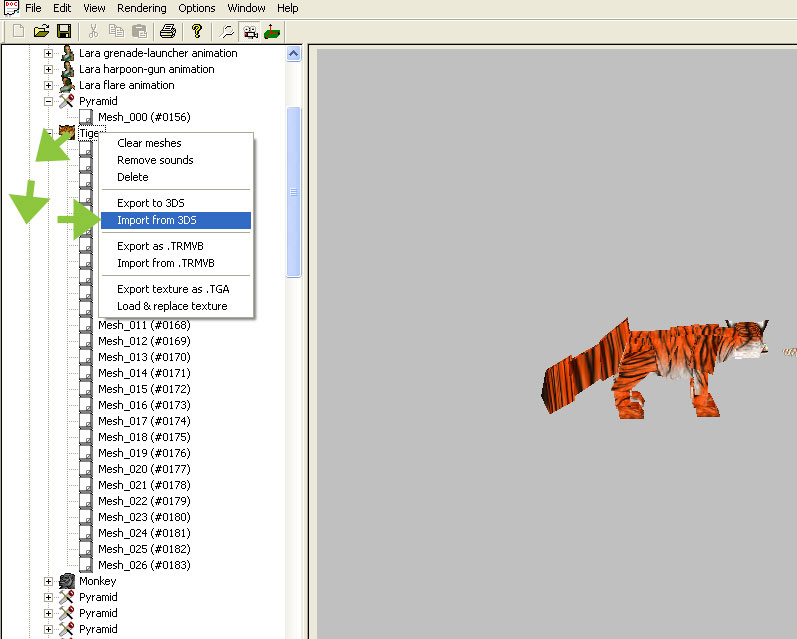
2. I'll open Jungle.tr2 and edit the tiger. |
 |
3. Now right-click the tiger and select "Export to 3DS".
|
 |
4. Save it.
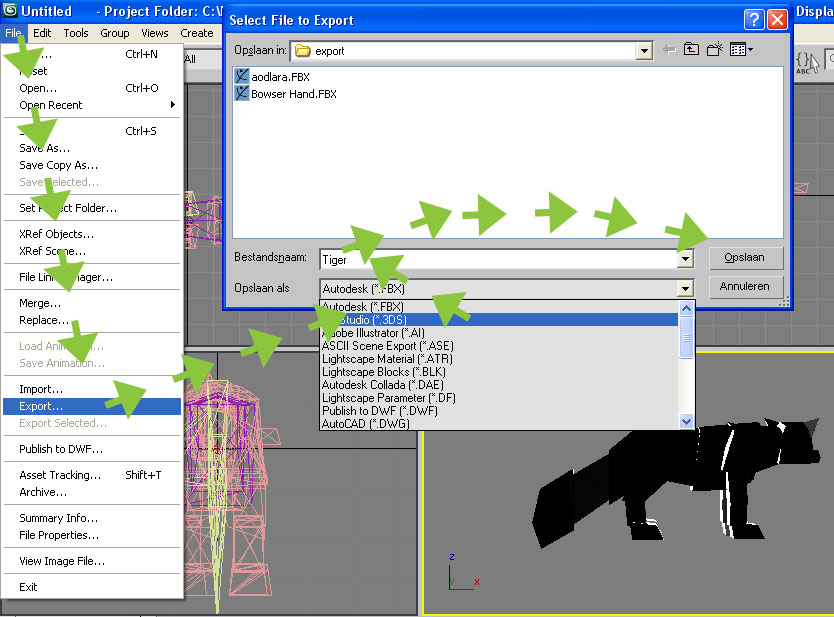
5. Open your editing software (I'll run 3DS Max 2009 32-bit).
6. Edit it.
Note for 3DS Max User: Use File\Import.
7. I'll make his tail bigger. Just to show how it works.
8. Now Export it.
Note for 3DS Max users: use File\Export\Preserve Max Texture Coordinates: Yes.
|
 |
9. Now, in TRViewer, right-click the tiger again and select "Import from 3DS".
Since I haven't added polygons, I don't need to retexture it.
If you have done so, you'll need to use PixStr (tutorial - select a texture and click on a polygon if you selected the object, then save) to retexture your object.
|
 |
10. Great! Now go to File\Save as and overwrite
or click the diskette button under the menu, above the list of objects.
Note: you've proably noticed there's an "Export texture as .TGA" button. This way you can export the texture, edit it and then use the "Load & replace texture" button to import it. Once finished with everythng, save. |
|
|
|
|
|