Level 31: The Mastabas
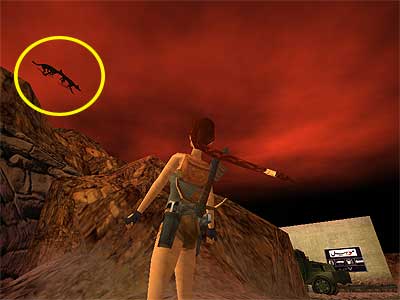
From your starting position it is possible to see some planks of wood bearing a "Danger" warning; ignore it. Draw your Pistols and head to the left. A dog appears from the passage between the two buildings. Start shooting at it whilst simultaneously jumping backwards. You should kill it without using up too much health. Continue to the left in the direction of the truck. A second dog appears from beneath it. Again, you can jump backwards to avoid the dog whilst at the same time shooting it. Go behind the truck and retrieve the Jerrycan from between the two gas pumps. Return to the cave. (Bug note - Take a look at the bottom of the page on how you can trap the two dogs in the sky!!) Secret (1-1\ total: 67-70) - Shoot the wooden planks with the "Danger" sign on it, and enter the building beyond. Kill the two bats that come down at you from up above and walk to the middle of the room. If you light a Flare or use the Binoculars, you will see the faint outline of a camouflaged trapdoor on the floor. Stand facing the trapdoor looking east (the entrance will be to the back of you), and press Action. Lara will open the trapdoor. Turn around and drop down backwards to grab the edge. Then climb down the ladder and turn around. In the dark hallway at the bottom you can discover a Large Medipack. Climb back up and exit the building. Go between the two buildings and kick the door open on the left. Enter and pick up the Revolver ammo from the northwest corner. To open the trapdoor, stand in front of the handle and press Action. Then drop through it. Draw your weapons because a dog appears when you step forwards. Kill it and follow the passageway. At the intersection, choose to go left. Keep your weapons drawn and Lara will auto-aim at two more dogs that come from the room at the bottom of the steps. If you start shooting promptly you will kill them quickly, and more importantly without losing health (step or jump backwards if necessary or backtrack to the intersection). In the room with the three lion's heads, pick up the Small Medipack and the Crossbow Normal ammo from the room's corners. You need to shoot the purple gems inside the heads to open the door on the north wall. If you decide to use the Crossbow with the Normal ammos, make sure you shoot at each gem whilst standing almost directly underneath the lion's head. If you stand in the middle of the room, the Normal ammos will not hit the gem. Once you open the door one way or the other, two mummies pop out and attack. You can blow them up without fuss, or totally avoid them, as they are slow. Go into the alcove and pick up the Small Waterskin. Exit and go back up the steps. At the intersection, opt for left and carry on following the hallway. Before you reach the end of it you will need to kill two more dogs. If you move whilst having your weapons drawn, Lara will aim at them automatically, meaning you can practically start shooting at them before you even realize what they are. Alternatively, backtrack to the passage that leads to the room with the three lion's heads, and kill the mutts from a more a secure distance. When you have taken care of them, climb out of the hallway and kill both the black scorpion and two bats that emerge from the east. Keep your weapons drawn and go through the gap between the rocks. A dog appears from just around the corner on the right. Take care of it from here or take a running jump over the pit to one of the ledges on the east side and kill it in comfort. Just to get yourself oriented with where you have emerged here in the context of the level, approach the deep pit in the west. You should be able to see the dark cave from whence you entered The Mastabas. Now approach the other pit and take a running jump to the opposite side where the wooden planks bearing the "Danger" sign are. Shoot the planks and kick open the door. Draw your weapons before stepping into the building. A dog appears that you can kill by stepping\ jumping backwards. Kill the two bats, too. That will leave you free to open the next trapdoor. Drop through it and follow the passageway. At the intersection, go to the right. Again, keep your weapons drawn and Lara will auto-aim at two dogs that come from the room at the bottom of the steps. If you start shooting immediately, you will kill them quickly. In the room with the three lion's heads, kill the bat before you do anything else. As before, you need to shoot the purple gems inside the lion heads to open the door on the north wall. From beyond the door, two mummies and two bats emerge. You can explode the mummies, or totally avoid them, as they are slow. If you decide to avoid them however, you may have a problem targeting the annoying bats. In that case, go up the steps from where you came (the mummies will not follow you) and kill the bats from there. Whatever strategy you deploy to overcome the hindrance, go into the alcove when you are done and pick up the Bag of Sand. Exit and retrace your steps back up the passageway. At the intersection, go to the right. You will shortly come to a second intersection. From this one, go left. Kill the dog and pick up the Revolver ammo and Large Medipack. Backtrack to the intersection and go left again. A second dog appears just after the corner. Take care of it and climb out of the hallway at the end. Kill the two bats that come at you from behind and open the door on the northeast wall. Shoot the wooden planks and emerge outside. Approach the deep pit. To get oriented with where you are in the context of the level as a whole, the area on the west beyond the pit is where you first started - it is the very first door you opened. From the southwest part of the pit, take a running jump to the extended ledge on the northwest (it looks like a triangular ledge from where you are standing). From here, take a standing\ running jump to the ledge on the right (northwest). Go through the passage between the rocks and kill a black scorpion that scuttles out from the far left corner. Turn around and kill a second black scorpion that attempts to sting you from behind. Open the trapdoor when these nuisances are taken care of and drop down. Follow the passage. At the T-junction, go to the right. Kill the dog and pick up the Torch at the end. Backtrack and follow the other side of the T. Again, keep your weapons drawn (which means that you need to throw the Torch down on the floor for now) and Lara will aim at three dogs that are attack from the room at the bottom of the steps. If you start shooting immediately you will most likely kill them quickly and without sustaining signific In the room with the three lion's heads, kill the two bats. Again, you need to shoot the purple gems inside the lion heads to open the door on the north wall. Once you have opened the door, go through it and kill two more bats. If you did not bring the Torch into this room when you first entered, go back and get it now before you proceed. Scale puzzle - You can see three scales in front of you. From left to right we have; Waves (Water), Sun (Fire), and Pyramid (Earth). If you are holding the Torch then throw it away for the time being. You may want to light it from one of the four lit torches on the wall so you can easily locate it later. Go behind the three scales and stand in the middle of the shallow pool. Enter your inventory. If you select the Small Waterskin, Lara will fill it with water. Stand in front of the Waves scale now and select the filled Small Waterskin from your inventory to pour the contents into the scale. Now stand in front of the Sun scale and select the Jerrycan from your inventory to. This will make Lara pour gasoline onto the scale. Pick up the Torch again next, and if you have not already done so, light it from one of the lit torches on the wall. Now stand in front of the Sun scale and ignite the gasoline with the Torch. Finally, stand in front of the Pyramid scale and select the Bag of Sand from your inventory. When you have done all this correctly, the left door (west) will open. Two mummies are lurking inside. You can blow them up or give them a wide berth. Your choice. Use the Crowbar to pry the Northern Shaft Key from the wall. When Lara picks up the Key, the other door (east) in the scale room opens. Go through it and pick up the Revolver ammo and Crossbow Poison ammo from the two back corners, close to the ramp. The gems in the lion heads here do not do anything, so do not bother to shoot them. As you approach the opening at the other side, draw your weapons and kill the two dogs that come down the steps with mischief on their mind. Go up the steps and follow the passageway. At the intersection, go left. Before getting the Large Medipack, position your body so then when you do pick it up you are facing back the way you came. This is because the retrieval of the goody triggers two dogs to attack from where you have just come from. Take care of them and return to the intersection. Turn left and follow the passage to the end. Climb through the opening and kill the black scorpion that approaches from the passage in the southwest. Go through the passage between the rocks and kill another black scorpion on the left. Approach the deep pit in the northeast and take a running jump to the ledge on the left. From here, stand on the horizontal edge facing south and take a running jump to grab the edge at the opposite side. Pull yourself up when you reach it. Kick the door open on the right. Enter the building and kill the two bats. Then open the trapdoor and drop through it. Follow the passage at the bottom whilst at the same time having your weapons drawn. Lara will soon take aim at a black scorpion. Kill it and continue onwards down the passage. At the intersection, go left. Kill another black scorpion and pick up the Revolver ammo. Return to the intersection and go left again (the right way is from where you came). Kill yet another scorpion as you go and at the end climb out of the passage. Be aware that a dog will attack as you approach the passage in the northeast. Shoot the planks of wood with the "Danger" sign written on it and kick open the door. Kill the two bats inside and open the trapdoor. Drop through it and follow the passageway. At the T-junction go right. Before getting the Small Medipack, turn around to face the way you came. This is because once again the acquiring of a pick-up will trigger a back-attack, and again from a dog. Keep your weapons out after this, as two more dogs will charge at you from the bottom of the steps shortly after. In the room with the three lion's heads, kill the two bats (have they copied the rooms?!?) Again, you need to shoot the purple gems inside the heads to open the door on the north wall. Once you have opened the door go through it. A cut scene shows the three monkey statues together with their corresponding lever mechanisms stationed in front of them. Monkey statues - The monkeys, from left to right, represent: "I can't hear/ Hear no evil", "I can't see/ See no evil", and "I can't speak/ Speak no evil". If you take a look on the ceiling at the far side of the room, you will see an inaccessible switch. Concentrate instead on what is right in front of you. It is possible to use the Crowbar as a handle to activate the lever for each statue. The left one releases a black monkey that attacks Lara, the middle one releases a transparent monkey that also attacks Lara, and the right hand one releases a friendly monkey that you MUST NOT KILL. This is because it will head for the high ledge at the back instead of Lara's flesh, and kindly activate the switch that opens the door on the right (east). (Note/ bug note - It is not compulsory to bring about and kill the first two monkeys mentioned above unless you are interested in getting the maximum amount of kills possible in the game. If you accidentally kill the friendly monkey however, or want to kill it because you are interested in all kills, you can use the Crowbar and activate the lever again, only this time through using the statue to the back of you. Also, make sure that you kill the friendly monkey in the SAME ROOM you activated him. If you kill him outside, you may activate a bug where you cannot activate him again, and you need the friendly monkey in order to continue.) Two mummies lurk outside. Dispatch them and use the Crowbar to pry the Southern Shaft Key from the wall. When Lara picks up the Key, the other door (west) in the monkey room opens. Go through it and do not bother with the gems in the lion's heads because they do not do anything. Go up the steps and follow the passage. Slide down, climb up onto the next two ledges, and go up the ramp to end the level. [Bug note about the dogs - As soon as the level begins, there is a dark cave to the back of you that cannot be entered due to the presence of an invisible wall. You can take the advantage of this invisible wall, though, and trap the two dogs that appear at the beginning of the level in the sky. The first dog is triggered when you run towards the passage on the left of the wooden planks bearing the "Danger" sign. As soon as the dog appears, roll and run towards the cave. Stand in front of the invisible wall and turn around. When the dog is ready to reach you, side-jump either to the left or right in order to avoid it (and if you are quick, you will not lose any health). It will hit the invisible wall, and because of the "block bug" it will even disappear and reach the top of the cave. You may need to side jump more than once, by the way. Check above the cave. At the beginning you will see a shadow. If you move a bit and keep playing with the direction keys whilst pressing the Look button, you will see the dog running at the top of the cave (as shown in this screenshot). This could be handy if you do not want to spend ammo in order to kill the dog, but keep in mind that the dog may fall down (Rommie reported this). You cannot kill the dog because Lara cannot aim at it, and this place is supposed to be "forbidden to reach" according to CORE. The LaserSight (even with the Crossbow Explosive ammo) does not seem to work because the dog disappears when you zoom in.
|
||
| « Level 30: Inside Menkaure's Pyramid | Index | Level 32: The Great Pyramid » |
| We would like to thank TR-Player and Nicky for their help. Many parts of this walkthrough would not have been written without their participation. Special thanks go to Scottlee for proofing the text. | ||
Tomb Raider 4: The Last Revelation Walkthrough & Game Guide © 2000-2007 www.tombraiderhub.com |
||