Tomb Raider 6: The Angel Of Darkness Walkthrough & Game Guide
Level 3: Industrial Rooftops
Kills: 2
Pick-ups: 14
Upgrades: YES (legs)
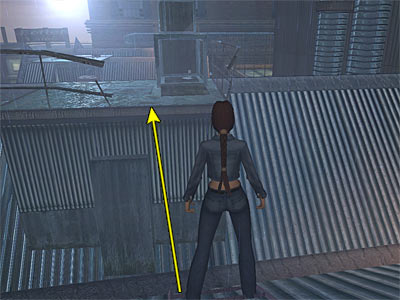
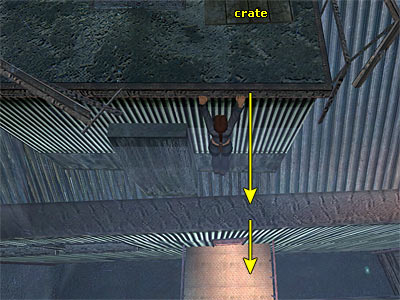
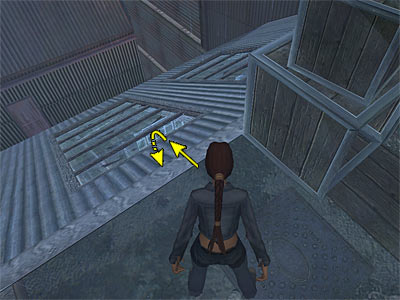
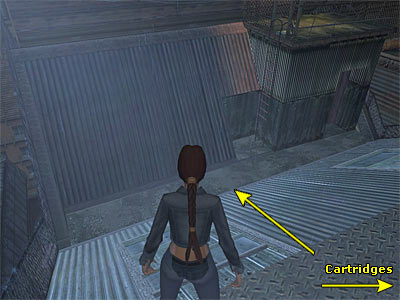
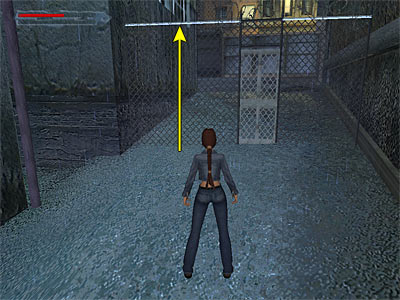
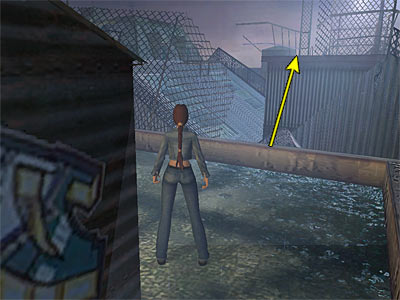
Since you left the Derelict Apartment intact, you need to cross the rooftops and make your way to Carvier. Crossing the rooftops - Jump or climb on the metal ledge and climb up the ladder. Turn left and jump up to grab the zip line. As Lara explains, press forward to swing across. Halfway, a helicopter appears and drops its lights to Lara. It will be above at many parts of this level and you need to avoid it as much as you can. If you are careful, Lara will not get damaged a lot, so there is no reason to be in a hurry. Press the Duck button, when Lara says so, to tag her legs up in order to pass the railings from below. Having the Duck button compressed, keep pressing the forward key until you reach the rooftop. Release, run behind the crates and pick up the Health Bandages. Walk down the ladder on the roof to the left. When you reach the end, jump to grab the opposite ledge (as shown in this screenshot). Pull up and crawl into the crate to get the Health Bandages. Crawl back out and stand up. Now you can do either: • Hang from the edge of the roof (where you pulled up before) and release to grab the sill below (as shown in this screenshot). Drop to the walkway and open the door. Pick up the Antique Doubloons and follow the hallway. Open the next door and enter the room. • Slide down the roof behind the crate, but do it backwards (as shown in this screenshot). Press Action whilst breaking the skylight to grab the edge of the opening. Release to drop to the floor. Get the Chocolate Bar from the furniture and pick up the M-V9 Clips from the floor. By breaking the skylight, you cannot open the door to the right of the Clips. It opens from the other side, so you just missed the Antique Doubloons. Exit the room by opening the other door. Cross the walkway. The door at the end leads to a warehouse, but you do not have to go there now. If you want, you can open it and take a look inside, but for now grab the ladder on the left. First, go up. So, climb to the top, then climb up the next short ladder. Pick up the V-Packer Cartridges and be careful not to accidentally slide down the roof at the other side (as shown in this screenshot), because you will reach the end of the level and miss several pick-ups. Make your way back and climb down the short ladder. Climb down the longer ladder, ignoring the walkway you came from on the right. When you reach the bottom, release by pressing Action to land to the ground, next to a flaming barrel. On the ground - Pull the movable box from the left to get an upgrade in leg strength. Make sure you position the box beneath the ladder, because this is the spot where Lara gets the upgrade (see this screenshot). Having the ladder on your right, move forwards and turn left around the corner. Cross the narrow passage to the left of the fence to get a Large Health Pack. Then return back to the fence. The door of the fence will not open, but if you take a look on the left part, you will see that there are no wires at the top (as shown in this screenshot). Jump up to grab this part and press forward to vault over the fence. As soon as you land on the ground, a dog appears that you have to kill. Go around the corner to the left and jump on the dump box. Pick up the K2 Impactor Battery and make your way back behind the fence. Then return to the flaming barrel where you got the upgrade. Continue to the other side of the alley and pick up the M-V9 Clips just on the corner. You can climb the fence next to the garage door (jump up and grab), but there is nothing more than a dog. So, go there if you are interested in getting all kills. Then vault over the fence to return back. Garage\ Warehouse - Crawl under the partly opened garage door and pick up the Large Health Pack from the left. Climb on the crate opposite the entrance and turn left. Jump to grab the walkway ahead and pull up. Go around to the left, ignoring the pipe that leads up. Lara reckons she will make it across if you have got the upgrade in leg strength (see above). Take a running jump to grab the narrow ledge at the other side of the room and traverse to the left around the corner. Pull up on the walkway and go to the other side. Climb up the ladder and dismount on the right. Pick up the V-Packer Cartridges and jump the gap. Open the door and enter the short passage. Open the next door and walk up to the edge. Jump across to the fire escape and first go down the stairs to get some Antique Doubloons. Go up to the top of the stairs and open the door. Climb up the ladder to reach a shed and open the next door to exit to the roof. Back on the rooftops - You are again at the top of the roofs. Go around to the back of the shed and pick up the Antique Doubloons. Approach the broken fence where the light of the helicopter is. Step on the narrow ledge and jump to grab the edge of the opposite roof (as shown in this screenshot). Pull up and climb down the ladder at the other side. Turn around and go to the end of the passage where you will find some Health Pills. Climb back up the ladder and jump to the previous roof. Approach the broken fence at the other side of the roof to end the level. The cut scene shows Lara walking to the edge of the roof. The helicopter finally tracks her and Lara jumps and grabs a pipe. It breaks and Lara falls down in a dump box. Our girl is very strong, since she survived from the drop. She now goes to meet Werner Von Croy's friend; Margot Carvier.
|
||
| « Level 2: Derelict Apartment Block | Index | Level 4: Margot Carvier's Apartment » |
| Last update: 06 October 2007: Text has been proofed and screenshots have been added. 17 February 2009: Text has been improved and all screenshots have been replaced. Also, new screenshots have been added. |
||
Tomb Raider 6: The Angel of Darkness Walkthrough & Game Guide © 2000-2009 www.tombraiderhub.com |
||