 |
 |
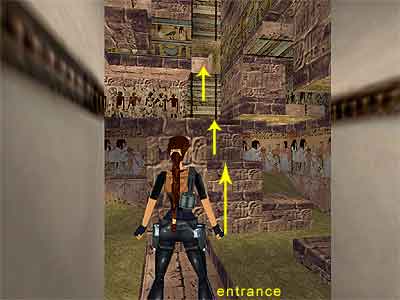
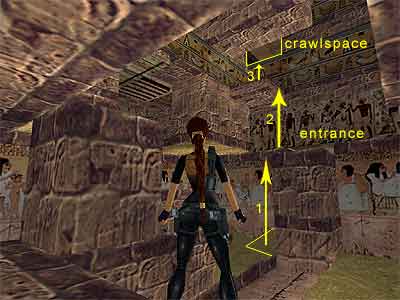
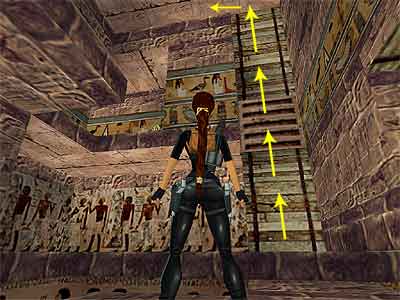
Climb up the blocks in the middle of the room and then climb in the opening above the ladder. Follow the passage to the next room. |
Push the movable block to block the entrance of this room. This raises the pillar back to the entrance, lowers one of the blocks you climbed up before in the middle of the room and raises a wooden platform that you (probably) have not seen\ noticed yet. Climb on the block and then climb into the crawlspace. Drop down at the other side and return to the room with the blocks and ledges. |
 |
 |
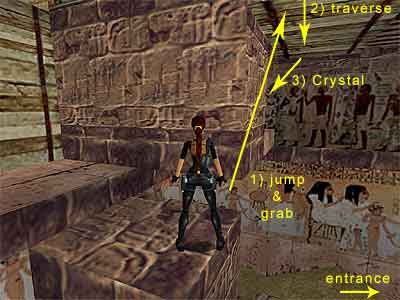
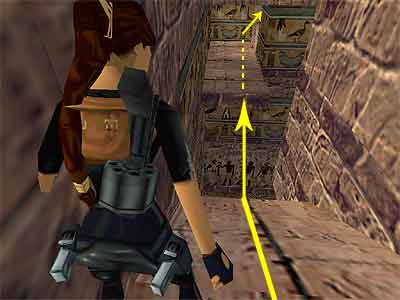
Stand on the topmost step. Facing the entrance, turn 45 degrees to the left. Take a standing jump to grab the wooden bars and traverse forwards. Turn left, hang from the edge of the bars, release and grab the ledge below. Pull up and get the Crystal. Safely drop to the ground. |
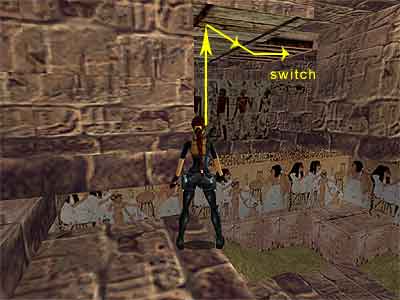
Climb up the blocks in the middle of the room and jump to grab the wooden bars again. This time traverse to the right, passing beneath the wooden platform you raised before. Release and grab the ledge below. Pull up and use the switch to open a door elsewhere (the exit door). Crouch and crawl backwards to drop to the ground. |
 |
 |
Climb on the pillar in front of the entrance, using the angled greenish ledge on the left of the pillar. Jump up to grab the ledge above. Pull up and climb in the crawlspace on the right. Drop down at the other side, turn around and climb on the ledge ahead. Follow the passage and drop down to the hallway, next to the crawlspace you got the Shells before. Enter the control room again and pull the movable block once to lower the pillar that blocks the entrance of the room with the blocks and ledges and raise again the tallest block in the middle of the room. |
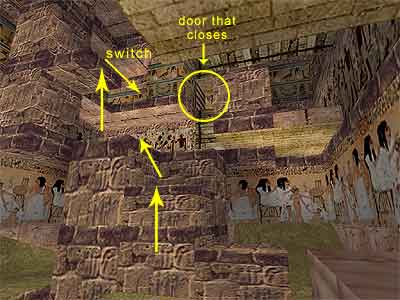
Enter again the room with the blocks and ledges and climb up the blocks in the middle of the room. Stand on the topmost block and having the entrance on your left, jump up to grab the ledge above. Pull up and turn right. Take a standing jump to the ledge with the switch, pressing Action to avoid hitting on the upper part. Use the switch to close the door of the passage you went through before. Carefully jump back to the ledge and drop down. |
 |
 |
Climb up this ladder and drop to the ledge on the left. |
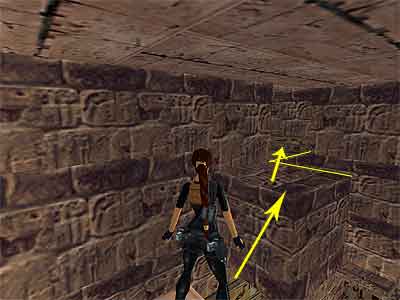
Turn around and take a standing jump to the block on the left, pressing Action to grab it. Pull up and jump to the next ledge. |
 |
 |
Be careful at the end because there is an opening below. Jump into the alcove on the left and pick up the Flares and the Shotgun Shells. Turn around and jump to the next ledge. Go to the right around the corner until you reach a slope. |
Slide down and jump on the edge to grab the ledge ahead. Or, slide backwards to grab the edge, pull up and press Jump and Roll and Action in order to back-flip, twist in midair and grab the ledge. Pull up and follow the passage... |
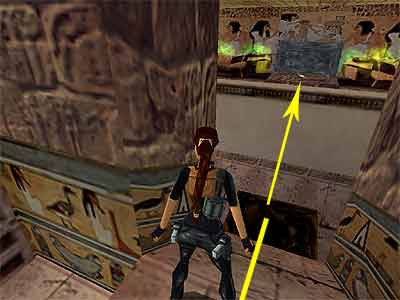 |
... to reach another slope with a decrepit ledge at the bottom. Slide down and as soon as you land on the decrepit floor, jump forwards to grab the ledge with the two mummy cases. Pull up and pick up the Embalming Fluid. |
Tomb Raider 3: Adventures of Lara Croft Walkthrough & Game Guide © 2000-2007 www.tombraiderhub.com
All rights reserved. All trademarks recognised.