 |
 |
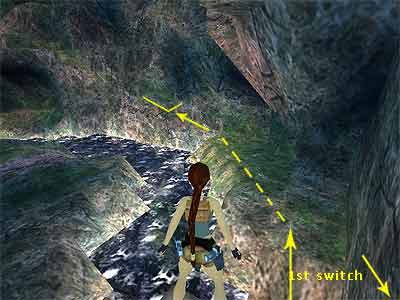
Take a running jump to land on the ground below and run to the far left side. Turn to face north and take a running jump to grab the ledge ahead. |
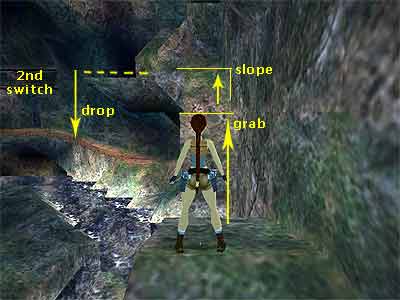
Pull up and again take a running jump to grab the opposite block. Take a standing jump to clear the slope and follow the ledge to the left. Safely drop onto the ledge and follow it to the west. Go through the opening and pick up the Small Medipack behind the gate. Throw the switch. |
The next screenshots are after making your way back. Lara is standing on the block that you raised after using the 2nd switch. |
|
 |
 |
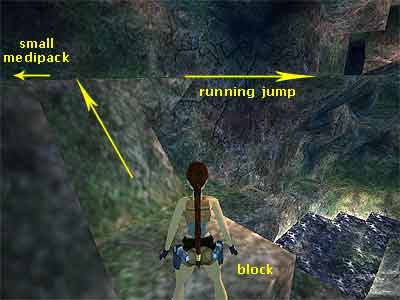
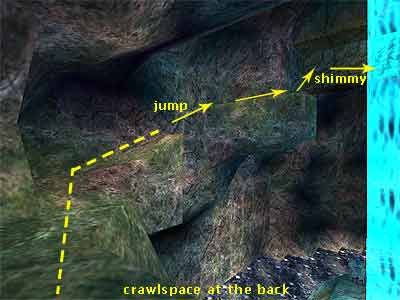
Climb onto this block and jump over the slope. There is a Small Medipack on the left that you may need now. Pick it up and head to the south. Take a running jump to grab the ledge that is a bit on the right and pull up. Run to the other side... |
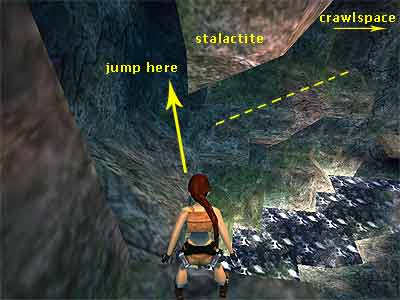
... and take a running jump to the left of the stalactite to land on a ledge below. If you attempt to jump to the right you will fall into the water, which means that you need to make it over again or load a previous saved game. Go to the right (west) hand side of the ledge and look a bit above to find a crawlspace. Take a running jump to grab it, pull up, and crawl through. Time for a breather now!! |
 |
|
Follow the crawlspace to the end and drop down. Turn to face west and follow the ledge as it goes to the right. At the end, and whilst facing north, take a running jump to grab the opposite ledge. Pull up and head a bit to the right of the ledge. Again, turn to face north and take a running jump to grab the climbable wall. Climb to the right inside the blue light where Seth's bolts cannot harm you. Then climb to the top. |
|
Tomb Raider 4: The Last Revelation Walkthrough & Game Guide © 2000-2007 www.tombraiderhub.com
All rights reserved. All trademarks recognised.