| |
Tomb Raider 7: Legend - Time Trial Tips for England |
|
|
 |
Below are tips and tricks for England's Time Trial. Most of them were found by the members of Tomb Raider Forums. If you are the original founder and have not been mentioned, please let us know.
Contact us
• We have included links to videos (hosted on YouTube). If a text part is vague for you, videos can be created upon request, so let us know.
• Do you want to submit your own tip or improve another one? Do you want to share your Time Trial? You can do it!! Contact us with your tip (screenshots and videos are welcome). |
|
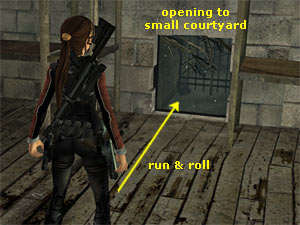 |
When you reach the small room above the start, use the Grapple to pull the grating. Instead of crouching and grabbing the edge of the opening, run and just before reaching it, press Roll to perform a low somersault, pass through the opening and land directly on the ground. |
|
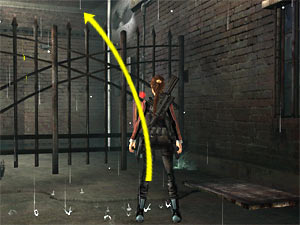 |
If you are able to perform the mysterious left roll, you can jumb over the gate. This video shows the procedure and the way back.
Found by: Gandarufu |
|
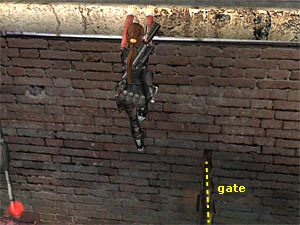 |
If you go the normal way, once you pass the gate, release to drop to the ground. Press the Interact button and Lara will move to the switch during the cutscene. |
|
 |
|
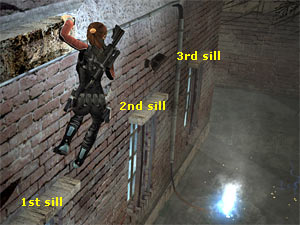
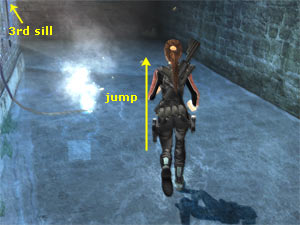
As you return back, do not bother grabbing the sills. Traverse to the end of the ledge (where it is broken) and jump to the right. Lara will land on the ground and close to the wires.
Turn the camera to face diagonally to the right and jump away from the harmful water. If you face left or straight ahead, Lara will grab the 3rd sill (in that case, just jump to the right). You will get shocked once by the electricity, but you have the time until the next one comes. |
|
 |
|
SHORTCUT
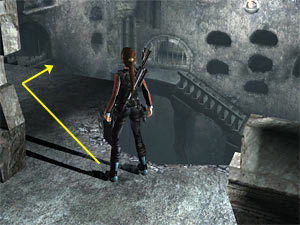
After the first interactive cutscene with the forklift, you have to reach the bottom of the deep pit. There is a quicker way to do that than climbing down the various ledges and stairs.
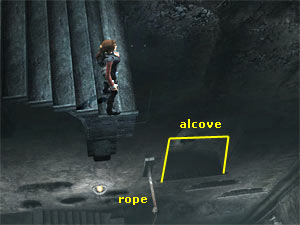
Getting oriented: After the cutscene, go to the left and down the stairs as usual. Take a look below to spot the rope. Next to it is an alcove. You can reach this alcove, completely bypassing the first two decrepit stairs and the pole. Run down the stairs diagonally to the left and press Roll as you reach the edge. You can watch a video here.
Found by: Tomb Raider Master
|
(Note: If you want to see a video with the camera behind Lara, click here. Also, if the above does not work for you, you can grab the rope. To do that, run down the stairs, staying in the middle of them, and press Roll as you reach the edge. You can see a video here.
Gandarufu found another way to go down the deep pit quickly, but it requires a lot of practice before doing the Time Trial. This video shows the procedure and gives detailed instructions.) |
|
 |
 |
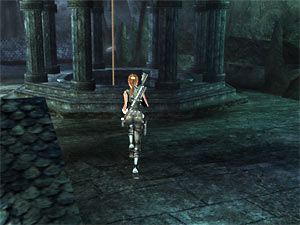
ALTERNATIVE SHORTCUT
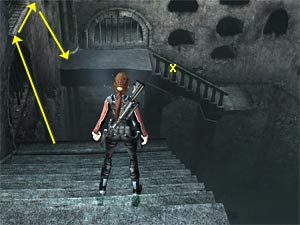
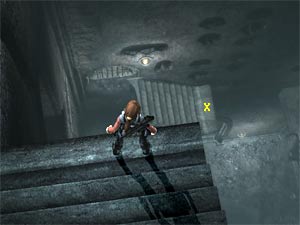
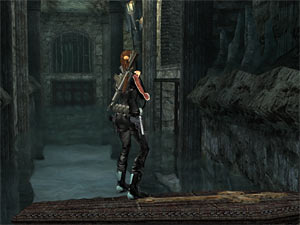
Proceed as usual until the first staircase that collapses. This is where Alister asks Lara to be careful and she replies "Please, Alister, this will take some concentration". Stand almost at the middle of the staircase (where the yellow X shows in the first image). When we say "almost at the middle", we mean towards the top of the staircase and not the bottom.
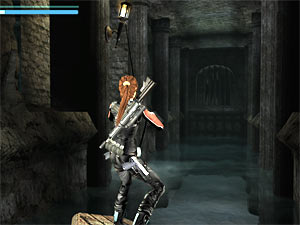
The staircase will soon collapse. This will make Lara drop to the staircase exactly below (if you positioned Lara as you were told above, she will land on the staircase and not fall to her death). Move to the bottom (where the yellow X shows in the second image). The staircase will soon collapse and Lara will Land to the ground.
(Thanks Lara Croft Fan) |
|
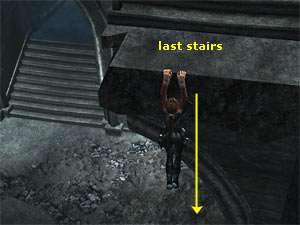 |
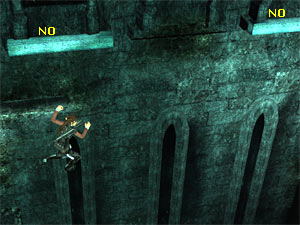
If the above Shortcuts do not work for you and you decide to go down the usual way, once you reach the last flight of stairs, do not jump to grab the ledges on the left hand wall. Istead, drop to the ground by either jumping down or grabbing and releasing. |
|
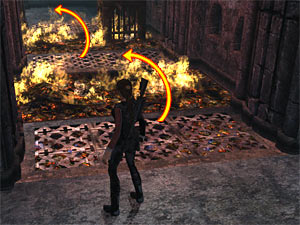 |
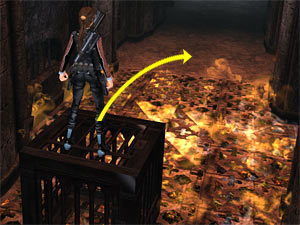
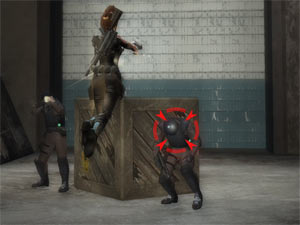
When you reach the first fire trap, do not bother pulling the box close to you. Hesitate a bit, until the first fire goes off. Run and jump over the first fire, then jump again above the second. Having your Pistols drawn will make Lara jump higher.
The first fire of the second trap does not go off, so either use the box to reach the other side or jump over the fires losing some health. You have to pull the box close to you and climb on the stone door. |
|
 |
|
Use the lever to open the door and bring the box inside (using the Grapple is quicker). Push it to stop the blades, enter the next room and go to the other side, where the other blades are. Use the Grapple to bring the box close to you and push it to stop the blades.
Enter the hallway with the long fire trap. Push the box on the fire, climb on it and jump above the fire. Lara will lose some health, but it is better than bringing a second box here which is a waste of time. |
Alternative method by Mytly: Once you climb on the stone door and drop down, do not use the lever. Go directly to the middle rotating blades and roll beneath them. Cross the room and go to the blades on the other side. Again, roll beneath them. If you time both rolls, you can pass the blades intact.
You can jump above the long fire trap without using the box (thus earning precious seconds), but this will make you lose 95% of your health. Run towards the fire and just before reaching it, start tapping the Jump button to start a sequence of flips. At one point, you wll touch down on the ground. Your health will start draining very fast. As long as you keep tapping the Jump button , you will take off again. The flips continue, but you reach the other side with your health almost completely drained... but alive!
This video shows the procedure (captured by Anubis_AF). |
|
 |
|
Channels with water: When you climb on the coffin, help Lara go faster by using the Grapple and pulling the coffin (and you) close to the openings in the wall. |
|
 |
After using the two rotating horizontal poles in front of the Temple, grab the crevic, but do not bother with the two sills above. You can jump and grab directly the ledge with the chain.
(Thanks Tomb Raider Master) |
|
 |
At the top of the Temple, you do not have to the grab and slide down the rope. Just fall through the opening to trigger the cutscene. If you grab the rope, press Crouch to release.
(Thanks Ada the Mental) |
|
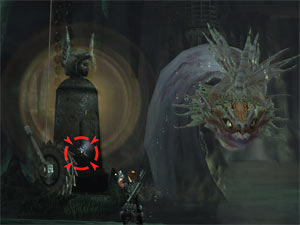 |
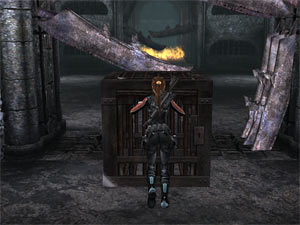
Fighting the snake: Here you need to be careful not to waste time on keep on shooting the tanks. A few shots are enough to make the snake turn its head beneath the cage. If the snake kills you, do not panic or quit. Try again.
When the snake appears close to a tank (the back left one for exampe), move to another tank (the right one) and shoot it. When you do that, the snake comes to the tank you shoot and it does not bother with you; it immediately turns its head beneath the cage.
This video (6,5 MB) shows the procedure step by step. You will see that the trick is to shoot a tank away from the snake. That way, you lure it close to you, but the snake has already been hypnotised by the shots and immediately turns its head beneath the cage. |
|
 |
|
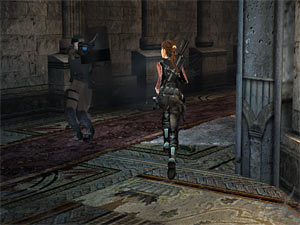
Your way back : As you return back to the warehouse, you do not have to bother with all guards. In the room with the rotating blades, you can use the box, stop the blades and ignore the guards. You probably have to kill those who are close to the fire traps and the one at the bottom of the deep pit, although you can totally ignore them.
When you use the metallic ledge that takes you up, ignore the guard that shoots you (kill him if it is necessary). Also, ignore the other in the hallway, plus the next two that hold a buckler in the circular room. Kill the last pair to end the level.
Briefly, you can ignore all guards and kill only the last pair, because it triggers the end of the level. |
|
|
|
|
|
|