Tomb Raider 8: Underworld Walkthrough & Game Guide for PS2
Level 2: Mediterranean Sea | Part 1: The Path to Avalon
Treasures: 2/8
Secondary weapon: Sticky Grenades
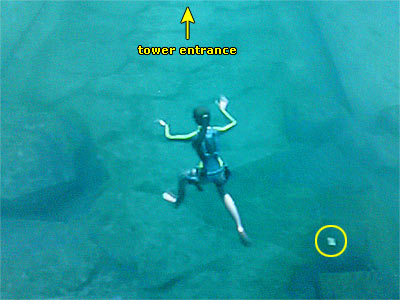
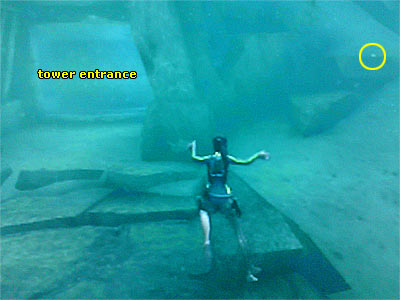
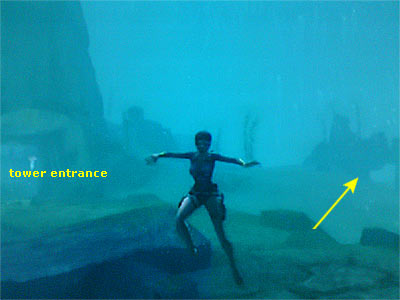
One week earlier, Lara was on her boat floating on the Mediterranean sea, as the cutscene shows. Using her laptop and speaking to Zip and Alister, Lara says she is close to finding Avalon. Her father was convinced that the path to the undiscovered island was here, as Professor Eddigton* told her. Although Alister doubts that her mother is still alive, but Lara wants to find the truth. [*Note: Underworld follows the storyline of Legend (at the end of the game Lara asked Zip to call Professor Eddigton and arrange a meeting) but it also includes elements from Anniversary (the remake of the original Tomb Raider game). If you have not played those games, you may have troubles following the story. To get an idea of what has happened, you can select Extras from the main menu, Trailers & Credits and then Previously On Tomb Raider.] [Checkpoint] This part of the level takes place underwater, but you will not have to worry about your breath because Lara wears an oxygen tank. At the bottom of the sea - As soon as the level begins, look down and to the right to spot something shiny (as shown in this image). This is a Treasure (1/8) so go and get it. Swim towards the tall tower ahead. The entrance is at the bottom, but before going through it, swim to the right hand side of it to get one more Treasure (2/8). (Its location is shown in this image). The door puzzle - Swim through the opening of the tower that offers two ways. Both lead to the same place, but if you go for the right hand way, be careful of the jellyfish, because it can hurt you. Continue to the room below where you will find the first puzzle. This is a door that consists of three mechanisms. Each one needs a handle to work and the middle mechanism has already the handle in its place, so you are missing the other two. Getting the First Handle - Swim back to return to the open sea. Turn left and head to the fallen rocks (see this image to get oriented). There is an opening at the back that leads to a small room with a jellyfish. Swim past it and turn right around the corner. The First Handle is lying on the floor, so approach it and press the Interact button to grab it. Swim back outside and return back to the tower. Approach the center of one of the two mechanisms and press the Interact button to put the Handle in its place. [Checkpoint] Do not rotate any of the Handles yet, so it will be easier later on. Getting the Second Handle - Again, swim back to the open sea. There are more fallen rocks, but this time to the right as you exit the tower. There is an opening at the back guarded by a jellyfish. Swim through it and turn left around the two corners to reach a room where the Second Handle is lying on the floor. Grab it and return back to the tower. Then put the Handle in its place. [Checkpoint] Solving the door puzzle - Examine the door and notice that each mechanism has three almond-shaped pieces. Notice that the middle mechanism has one common piece with the left and one common piece with the right mechanism. You have to rotate the mechanisms so that the middle one has the three pieces with the "opened eye" designs (the light-coloured ones). If you have not used the Handles at all, this is how you can open the door: Use the middle Handle once, the left one once and the right one twice. Once you do it correctly, the door opens. [Checkpoint] Twisted hallway - Swim through the doorway and follow the hallway as it goes. [Checkpoint] It makes some turns, but there are no junctions to confuse you. Just keep going, avoiding the jellyfish. When you reach the end, you will see a giant tentacle. Once you approach it, it will retreat and clear the way. Swim through the hole. There is an opening in the ceiling where you can surface, but you cannot climb out, so keep swimming to the next room. Surface and climb out of the water, using the low ledge on the right.
|
||
| « Prologue: No Illusions | Index | Mediterranean Sea | Part 2: Niflheim » |
Tomb Raider 8: Underworld Walkthrough & Game Guide © 2000-2009 www.tombraiderhub.com |
||