|
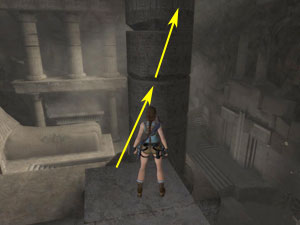
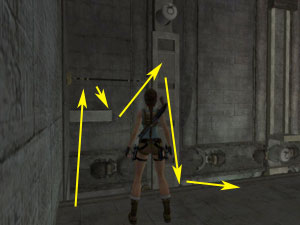
Once the level begins and you kill the two mummies, climb the stairs to the top. When there, turn the far left pillar twice in any direction. Then go back to turn the pillar just to the right, again, twice in any direction. That will cause the central block to rise immediately. |
 |
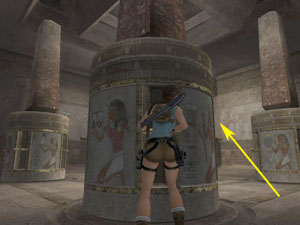 |
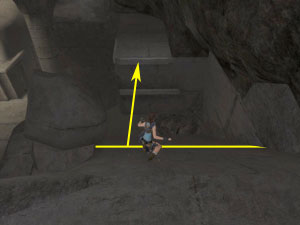
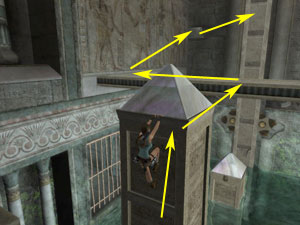
While turning the second pillar, having turned it once, turn it only a little on the second turn. Immediately release Lara's grip and swan dive onto the block that has already started to rise. That way you will be on its top when the cut scene ends.
|
|
 |
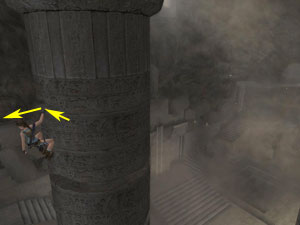
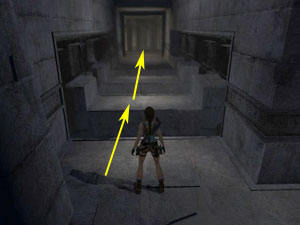
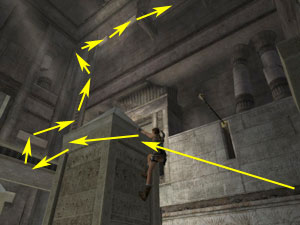
Having jumped onto that central block, it's then easiest to climb up to the top of the shaft by first using the three ledges to the right side. Then traverse left, around the corner, and climb up another two ledges. Next, turn around and jump and grab the ladder behind you. From there, climb up to the top. |
|
 |
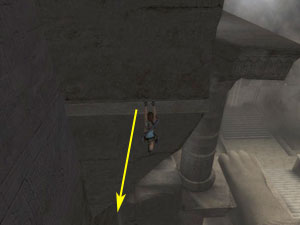
Once at this point, jump to the first scarab ledge, turn around, and then immediately jump from it. That way you will directly grab the ledge above the second scarab switch. |
|
 |
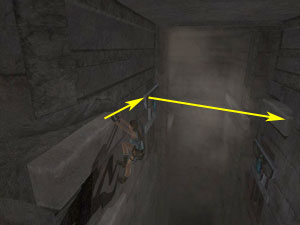
Here, you don't need to traverse all the way to the left. When you reach this point, you can turn around and jump to the ledge behind. |
|
 |
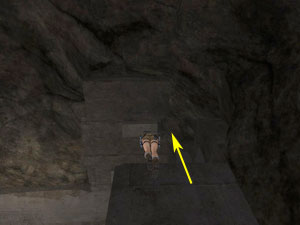
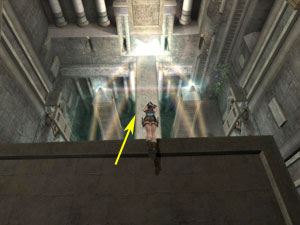
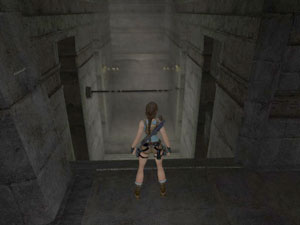
When you emerge in the main room, go either left or right, and roll over the ledge by landing on the slope to the either right or left side, just like in the screenshot on the left. Lara will loose a little bit of health. |
|
 |
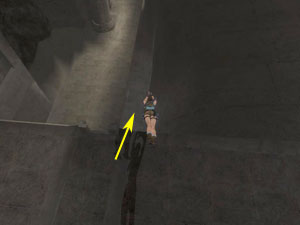
On your way to the left of the two side-rooms, once you reach this slope, wait for Lara to cross the yellow line and then jump to grab the upper one of two ledges in front of you. |
|
 |
Before reaching the upper platform, make your way on this crack, traverse left a little and then turn around to jump to the ledge behind. |
|
 |
In order for the flying mutants to die quickly (preventing them from knocking Lara off the ledge), it is best to use a powerful weapon such as the Calibre Pistols. Repeat the process on the opposite side with the other pair of flying mutants. |
|
 |
When you traverse this ledge, stop at this point. Then, turn Lara around and jump to the ledge behind. |
|
 |
To quickly reach the switch below, roll over the edge. Repeat the process on the other side of the room. |
|
 |
To quickly pass this trap, jump onto the centre of the first platform and crouch. Once the trap opens, jump to the second platform and from there, jump quickly through the entrance to the room with the inverted obelisk. |
|
 |
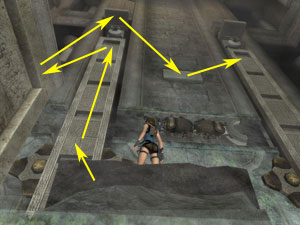 |
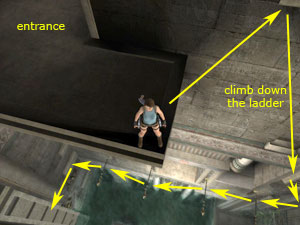
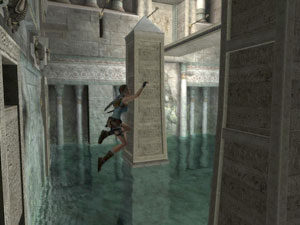
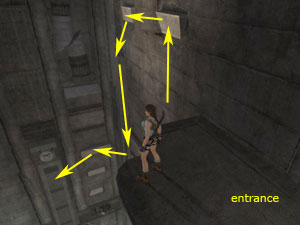
To quickly pass the left side-room, first, turn left, make your way over two ledges and climb down the ladder. From there, turn left and, going over four horizontal poles, quickly make your way to the ledge opposite. From there, drop down onto the lower ledge and then jump left onto the first vertical panel (first screenshot to the left). Once you pull it all the way down, drop into the water, swim to the opposite side and get out. Jump onto the second vertical panel and pull it all the way down. Turn around and jump onto the pillar that has just risen up behind Lara. Climb to its top, turn around and jump to the ledge at the top of the second panel. From there, jump to the ledge on the wall and then to the right and onto the third vertical panel (second screenshot to the left). |
 |
 |
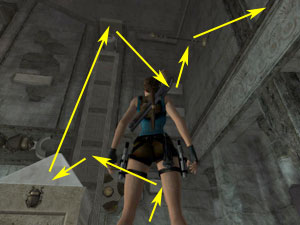
Turn around and jump onto the pillar that has just risen and climb to its top. Traverse around either corner and jump to the bridge in the middle of the room. Go left and wall-run to the ledge on the opposite wall. Traverse right and jump onto the fourth vertical panel (first screenshot to the left). When you pull it down, turn around and jump onto the risen pillar (if you haven't already done so), and climb to its top. Traverse around either corner and jump to the bridge. Go left, then turn right and make your way over two horizontal poles to the two sets of ladders. Climb those and then jump over two ledges on the left side, back to the entrance of the room (second screenshot to the left). |
|
 |
Turn around and jump to the pillar before the cut scene of the bridge extending all the way begins. Repeat the process in the other side-room. |
|
 |
When you pull the switch at the top of the side-room, immediately roll over the edge to drop down onto the bridge. Lara will lose some health. Repeat the process in the other side-room. |
|
 |
It will be easier to kill the mummy before entering the room with the Ankh Key. Repeat the process in the other side-room. |
|
 |
On your way to the right side-room, jump from this ledge, directly to the crack in the pillar. Then continue making your way up. |
|
 |
When you reach this point, do not swing too long on the poles. You can get crushed by wall traps, or you can fall down once the first pole retracts into the wall. The best way to pass these is to jump to the first pole when it extends out of the wall (and when the wall trap is open), then, immediately jump to the second pole. The second wall trap will open, so you can pass through. From there jump to the ledge opposite. |
|
 |
 |
To quickly pass the right side-room, turn right as you enter the room and jump to the first ledge on the wall to the right. Make your way over the second ledge to the ladder on the wall and climb all the way down. From there, turn left to jump to the ledge and then traverse left to jump onto the first vertical panel (first screenshot to the left). Then drop into the water and swim to the left side, where you can climb out. Jump to the vertical structure, and from there, to the ledge on the wall. Jump left onto the second vertical panel. When the pillar behind you rises, turn around and jump to it. Climb to its top, turn around, and jump to the ledge above the second panel. From there, jump to the ledge on the right, turn around, and leap to the horizontal pole. Swing to the bridge in the middle of the room (second screenshot to the left). |
 |
 |
Jump to the pole in front of you and leap onto the ledge on the opposite wall. Turn right and jump to the third vertical panel. When you pull it all the way down, turn around and jump to the pillar that has just risen. Climb to its top and traverse around either corner. Jump to the bridge and go left. When you reach the edge, turn right and quickly jump over two horizontal poles, to the ledge on the opposite side (first screenshot to the left). From there, jump right onto the fourth vertical panel. When you pull it all the way down, turn around and jump to the risen pillar. Climb to its top, traverse around either corner, and jump to the bridge. Go left and quickly make your way over the two horizontal poles to the ledge on the wall. From there, jump to the ladder on the right and climb all the way up. Make your way over two ledges on the right, back to the entrance (second screenshot to the left). |
|
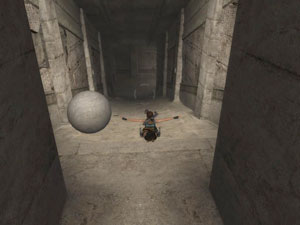 |
When you put both Ankh Keys in their receptacles, ignore both rats and the moving ball. Just keep swan diving all the way, until you reach the pool at the bottom. |